
The more I coach photographers and edit their work, the more I realize perhaps the most critical decision you can make when creating an image is deciding what perspective are you going to take.
How are you going to approach your subject?
While sorting thru a recent take of my work shot at Meadowlark Gardens in Vienna, Va., I noticed several frames that would help illustrate this point, the good, the bad and the ugly. This fabulous bronze and steel sculpture, entitled “Sharing A Story,” was created by artist Marie-Pierre Philippe-Lohezic. (Please see more examples and text below)
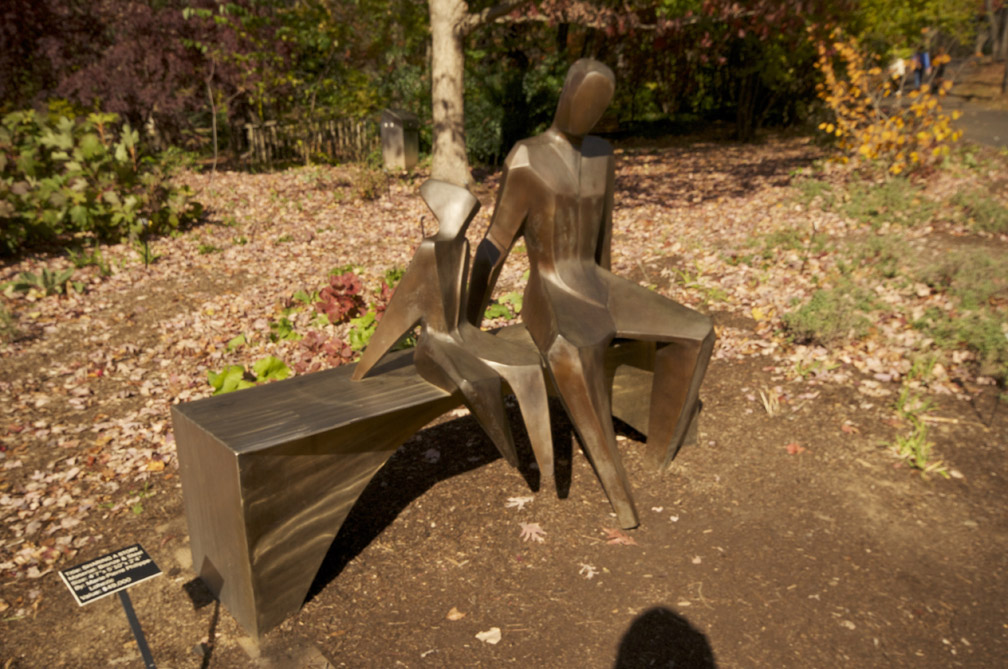
Most people’s beginning instinct when taking pictures is to approach a subject head on, as illustrated in this photo above.
What is wrong with this photo? It is cluttered, especially in the background. It really has no central focus point, a part of the photo you can key off of. This photo, much like the two people depicted on the bench, just sort of sits there. It is also not helped by the fact I was shooting down on the subject with a wider angle lens. This can skew lines and also is like a visually vacuuming all the clutter on the floor of the park. The photo clearly does accentuate the beauty this piece of art has to offer. Lets go to the next photo below.
Ideas for taking photos without a tripod? Please check out “No Tripod No Problem.”
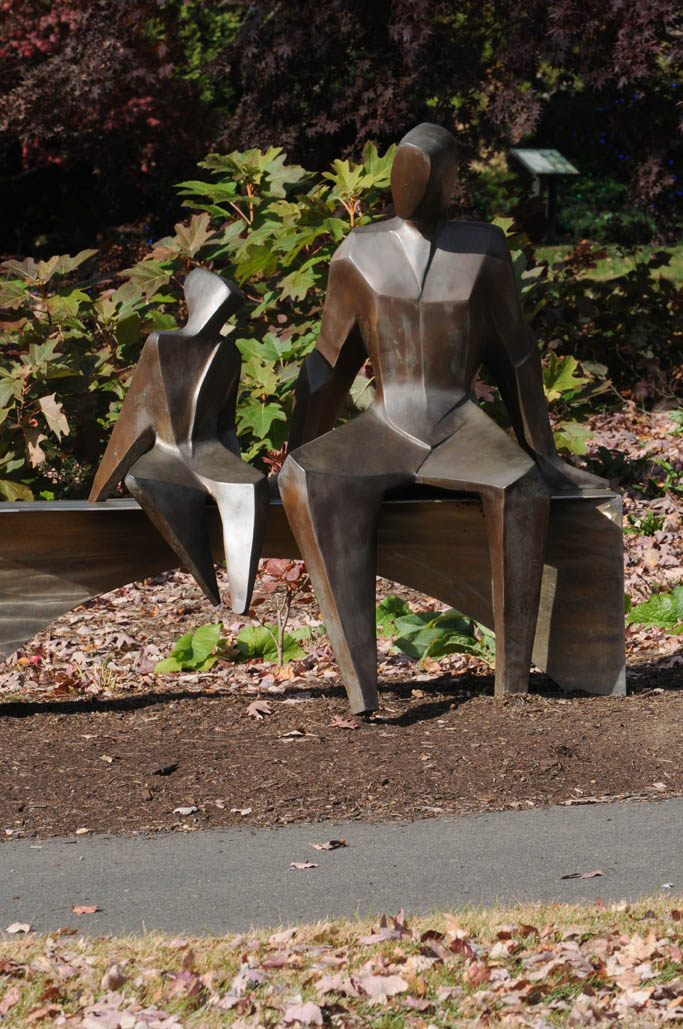
I shot this photo with a slightly longer lens. This photo is not as cluttered thanks to the fact I just moved over a few feet, still, the viewer really is not going to key off of the statue in this photo either because the leaves in the background are too bright (your eyes are usually going to go first to the brightest part of a photo) and the leaves are also too sharp, something that could have been fixed either by using a more shallow depth of field (lower f-stop number), an even longer lens, or we could try something even more radical. Please see next photo.

This photo was taken with much longer lens, several feet behind the sculpture, eliminating the busy backgrounds and now the maple tree branch actually frames the sculpture instead of
making the photo busier. I am beginning to like this photo, but I still think there is more to this photographing this sculpture.s
I always recommend taking a 360 approach to your subjects. Composition, lighting and angles can take on a totally different look by just moving around the person or around the scene you are photographing.

The other aspect that comes into play when photographing a statue or sculpture is I want to interpret it in the way I see it. I do not want to produce a carbon copy of the the artist’s work. This sculpture has some incredible lines and a very well defined graphic shape to it. So by applying the widest lens I have, about 10mm, I lowered myself about as low as I could under the sculpture to make it look a lot larger and more imposing that it is in person or as it would look with a 50mm lens shot straight on.
This frame still had some composition issues as there were too many trees behind it and some of the branches seemed to merge into the top of one of the heads.

I gradually moved my viewfinder to the point that I could compose the photo so there was some air between the tops of the sculpture and the trees so the figures were much better defined. A final touch included making the photo black and white. I felt this change added even more graphic appeal and by eliminating the color there just seems to be less distraction from the subject at hand.
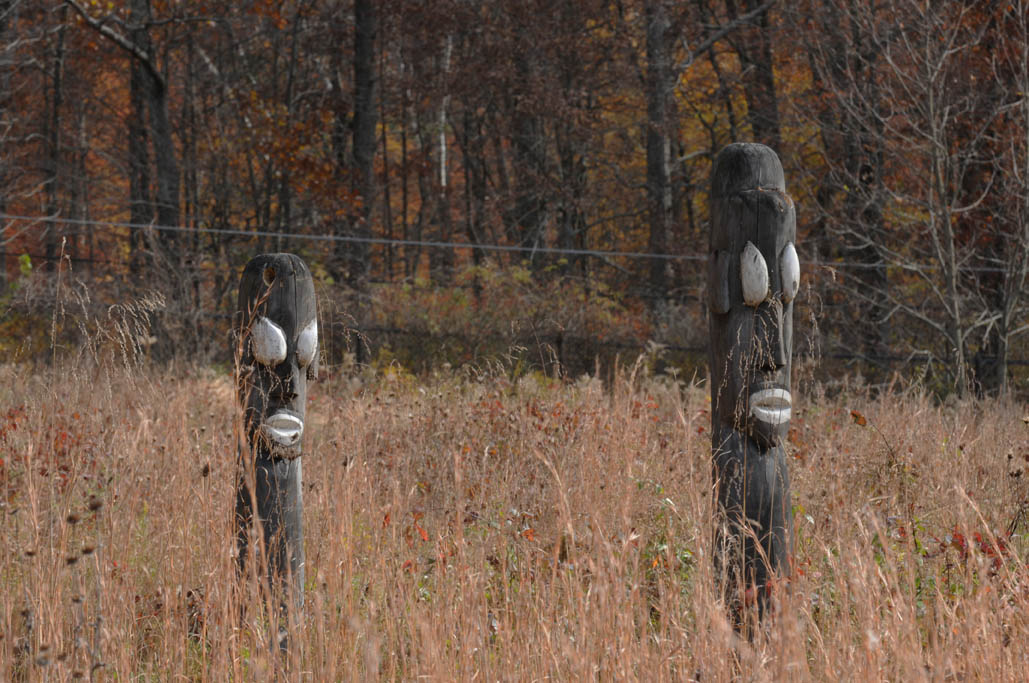
These photos were also taken at the part on the same day of another piece of art. The first photo was extremely busy but by just moving a few feet and taking a slightly different angle,
I ended up with a nice clean background.
The bottom line here is before you start firing away, take some time to see what you are photographing. The few minutes you spare to take in the scene will give you a much better feel for what you are photographing and where you want to go with it.

Thanks so much for dropping by today. I hope you found this helpful. Rob
Related articles
- Taking Pictures of Endangered Species | Animals & Plants from Nikon (nikonusa.com)
- Weekly Photo Challenge Habit : Sculptures at Meadowlark Gardens (iseebeautyallaround.com)
- Western Meadowlark (5280lensmafia.wordpress.com)
- Tripping the Light Fantastic at Meadowlark Gardens Part II (iseebeautyallaround.com)
- Tripping the Light Fantastic at Meadowlark Gardens Part I (iseebeautyallaround.com)
- meadowlark botanical gardens & the new korean bell garden (catbirdinamerica.wordpress.com)


Wow, just find out about your article.
Thank you so much for sharing my sculpture as an example…
I just saw some angles I had forgotten about.
Marie-Pierre
LikeLike
Great, I am glad you saw the post. I love your work and thank you for inspiring me with your sculpture at Meadowlark. I am stuck at home due to the weather today but if I could get to the park I would love to photograph your sculpture peeking out of the snow. Cheers, Rob
LikeLike
you know, I had a couple of questions, when you have one of your pieces like this one placed in a park or in another public place, are you involved in deciding where it will be located? Out of the different photos I shot of your sculpture, which one do you think best captures your original vision? I think that is one of the great things about 3 dimensional art, there are so many different ways you can physically look at, which is typically not the case with a photo or a painting. Taking a photo is a great way to do this as in my case, if forces me to get on the ground and look up, or stand 100 yards away with a long lens and compress what I am seeing with my eyes.
LikeLike
I appreciate the tutorial…I’m always looking to learn something from the awesome photographers I follow. I’ve begun to understand the difference between taking photos and composing a photo…thank you!
LikeLike
sure, please let me know if you ever have a question or ever need specific feedback on a photo you are working on. rob
LikeLike
Thank you Rob for your offer of feedback or to answer questions…it is very much appreciated! I know I learn by doing including from my mistakes, but I welcome constructive criticism as I know it helps me learn as well, by pointing out details/ideas/composition/angles, etc., I missed or didn’t understand! I’m slowly learning, which I’m sure is a life long process! 🙂
LikeLike
sure, glad to help. and yes it is a life long process, I am always learning and I have shot professionally for several decades.
LikeLike
Great examples, Rob!!!
LikeLike
Well done! This is great reading and a fine tutorial. The photos speak for themselves, makes it easy to remember. Thanks a lot!
Greetings from the Rhine Valley
Dina
LikeLike
Hi Dina, I am so glad you found this post helpful!
LikeLike
🙂
LikeLike
Excellent examples! Such an amazing difference between first and best shot. Very helpful to see the practice. Everybody has to do it no matter how much experience you have.
LikeLike
good point beth! Thanks for your comment. Rob
LikeLike
Why, yes, I did find it helpful. Looking forward to the next time I’m around statues to try this out. Thanks!
LikeLike
Thanks Randee, glad you found it helpful.
LikeLike
Beautiful gallery !
LikeLike
Thank you so much for sharing your expertise! These are practical tips and information. I definitely will start taking time before I fire up… 🙂
LikeLike
good deal amy! Thanks for adding to the conversation, Rob
LikeLike
Nice way to use examples to make your point!
LikeLike
thanks greg!
LikeLike